Hey everyone! Jacob Hardison here from Adrenaline RC Racing, and welcome back to the Racer Rebuild Series.
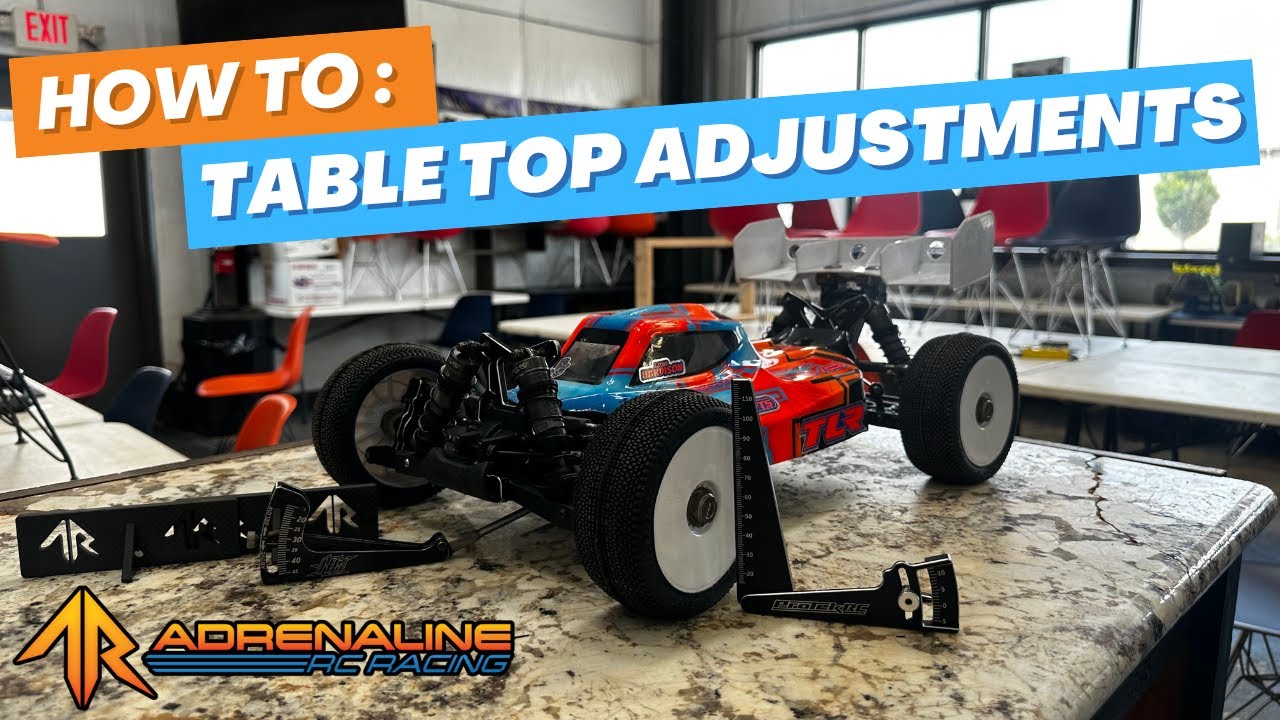
By now, you’ve learned how to glue your tires, rebuild your shocks, freshen up your diffs, and clean your car. So what’s next before you hit the track? It’s time for some critical tabletop adjustments — droop, camber, and ride height. These settings make all the difference in how your RC car handles on race day, and today I’m walking you through how to dial them in.
Let’s jump right in!
🔧 Tools You’ll Need:
-
Droop blocks or calipers
-
Battery pack, transmitter, wheels, and tires
(You can grab all of these at Adrenaline RC Racing)
Step 1: Setting Droop
What is droop?
Droop controls the amount of shock extension and determines how much suspension travel your car has when it’s in the air or unloaded.
How to set it:
-
With calipers: Measure from the center of the wheel nut to the center of the shock mounting screw. For example, set the calipers to 102mm, adjust the droop screw with your 2mm hex driver, and fine-tune until the measurement matches.
-
With droop blocks (Jacob’s method):
-
Remove the wheels and set your car on droop blocks.
-
Place a ride height gauge under the axle’s threaded part.
-
Adjust the droop screw until you hit your target — e.g., 29mm in the front, 25mm in the rear.
-
Repeat on the other side for balance.
-
Step 2: Setting Camber
What is camber?
Camber is the angle of the wheels relative to vertical. Negative camber (tops tilted inward) improves cornering, while positive camber (tops tilted outward) is rarely used.
How to set it:
-
Install the battery and wheels to match real track weight.
-
Center the steering and turn on your radio.
-
Use a camber gauge (Jacob uses -2° camber) against the wheel.
-
Adjust the turnbuckle until the top and bottom of the tire evenly touch the gauge.
-
For pillow ball cars, the front camber may be preset; just adjust the rear.
Step 3: Setting Ride Height
What is ride height?
Ride height is the distance between the chassis and the ground. It affects stability, traction, and weight transfer.
How to set it:
-
Roll the car forward to settle the suspension.
-
Place the ride height gauge behind the front gearbox and in front of the rear gearbox on flat sections of the chassis.
-
Adjust the shock collars:
-
Lower the collar to raise ride height.
-
Raise the collar to lower ride height.
-
-
Typical targets: 24mm front, 27mm rear.
Final Check
Once droop, camber, and ride height are dialed in:
-
Drop the body on, clip it up, and you’re ready to race!
Bonus Tips
✅ Always measure with race-ready weight (batteries, tires, body).
✅ Recheck settings after a few laps — things can settle.
✅ Keep a notebook of your baseline settings for different tracks.
That’s it — your RC car is now fully rebuilt and dialed for the track. I hope this walkthrough helps you get the most out of your next race day. See you out there!
👉 Need tools or parts? Check out Adrenaline RC Racing for everything you need.